AWS Cloud Onboarding Guide
Step-by-step instructions for connecting your AWS accounts to Park Your Cloud using IAM roles and CloudFormation. Choose your method below.
See what gets parked on AWS →Navigate to Accounts and Start AWS Onboarding
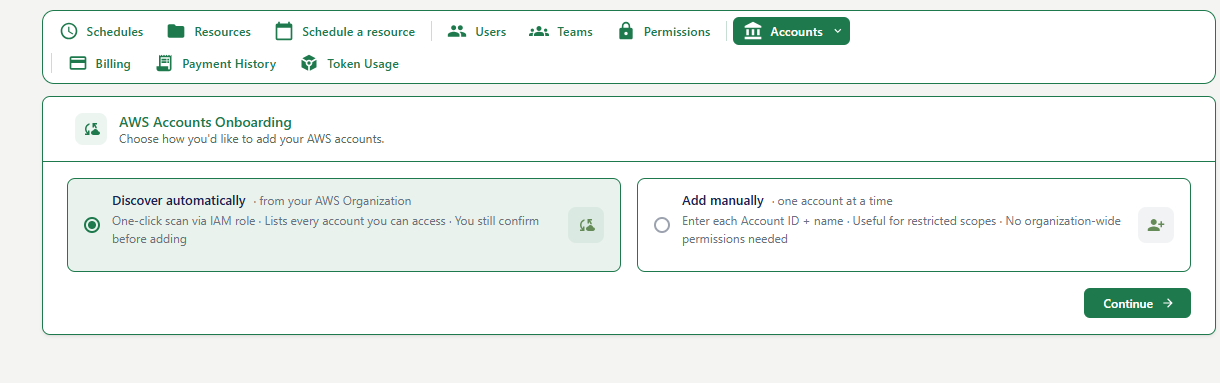
Where you are: The AWS Accounts Onboarding screen.
How to get here: Click Accounts in the top navigation bar, then select AWS from the dropdown.
| Option | When to use it |
|---|---|
| Discover automatically | You have an AWS Organization set up. The system will scan all accounts using an IAM role. Best for most users. |
| Add manually | You want to add one account at a time, or you do not have organization-wide permissions. |
If unsure, go with Discover automatically. You will still review and confirm each account before it is added.
Configure IAM Role (Step 1 of 5)
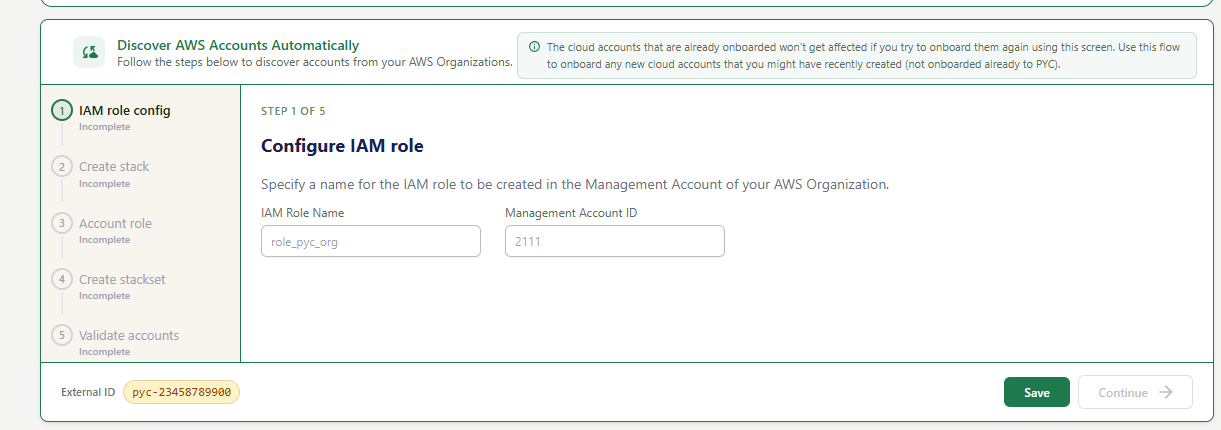
A 5-step wizard on the left sidebar. You are on Step 1: IAM role config.
If you have already onboarded some AWS accounts before, this flow will not affect them. It only adds new accounts not yet onboarded to PYC.
| Field | What to enter | Example |
|---|---|---|
| IAM Role Name | Name for the IAM role PYC will create in your AWS Management Account. | role_pyc_org |
| Management Account ID | Your 12-digit AWS Management (root/master) Account ID. | 000000000000 |
At the bottom of the screen you will see an External ID (e.g., pyc-00000000000). This is a unique security token auto-generated by PYC. Copy this value - you will need it when deploying the CloudFormation stack in the next step. Do not change or ignore it.
Create CloudFormation Stack (Step 2 of 5)
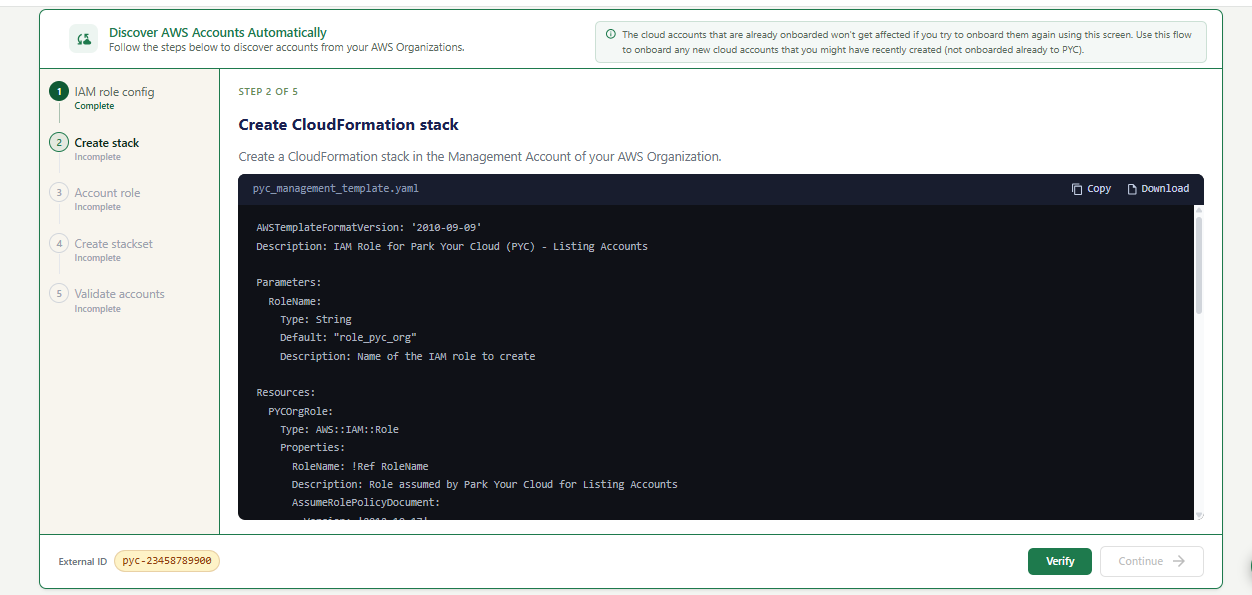
A CloudFormation template file (pyc_management_template.yaml). This template creates an IAM role in your AWS Management Account that allows PYC to list all accounts in your organization.
This IAM role gives PYC read-only permission to list all AWS accounts under your Organization. Without it, PYC cannot discover accounts automatically.
Configure Account Role (Step 3 of 5)
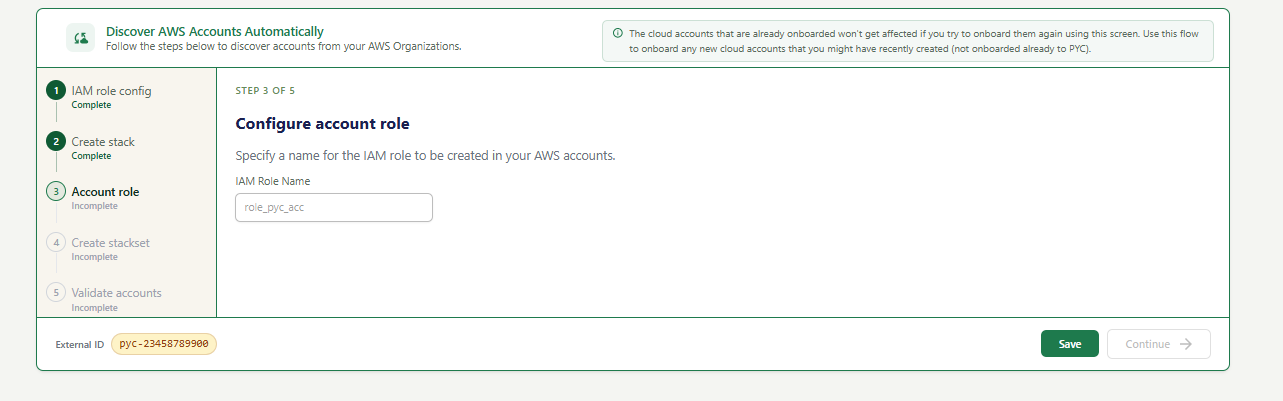
A single input field for the IAM Role Name to be created in your individual AWS member accounts.
| Field | What to enter | Example |
|---|---|---|
| IAM Role Name | Name for the role to be created in each member account. Keep the default or use a custom name. | role_pyc_acc |
This is different from the role in Step 2. The Step 2 role was for your Management Account (to list accounts). This role is for each member account (to allow PYC to start/stop EC2 and RDS resources).
Create CloudFormation StackSet (Step 4 of 5)
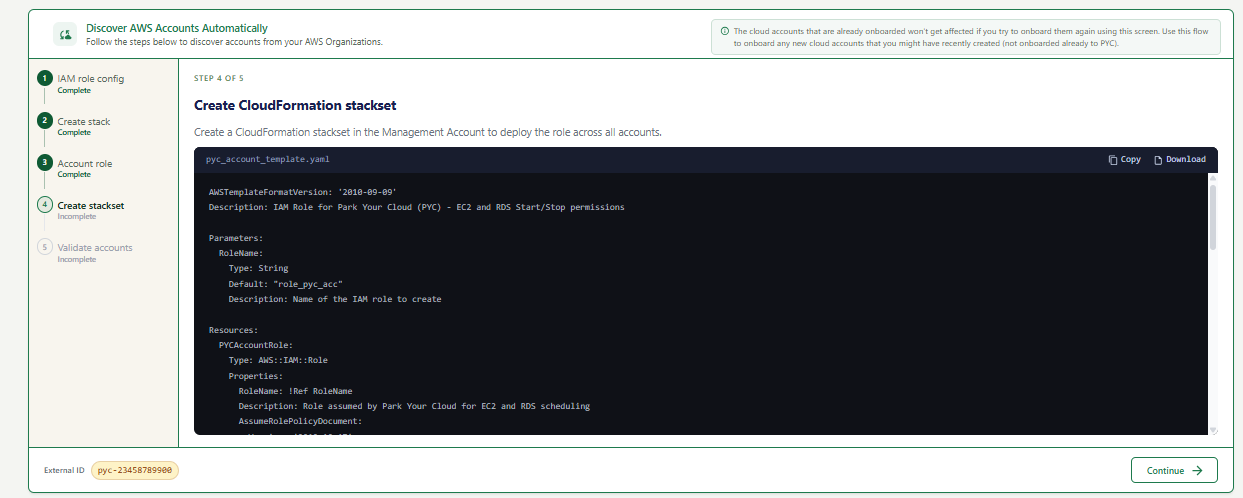
Another CloudFormation template (pyc_account_template.yaml). This deploys an IAM role across all your member accounts at once using a StackSet - no need to do it account by account.
This role gives PYC permission to start and stop EC2 and RDS resources in each member account. The StackSet deploys it to all accounts in one go.
Validate Accounts (Step 5 of 5)
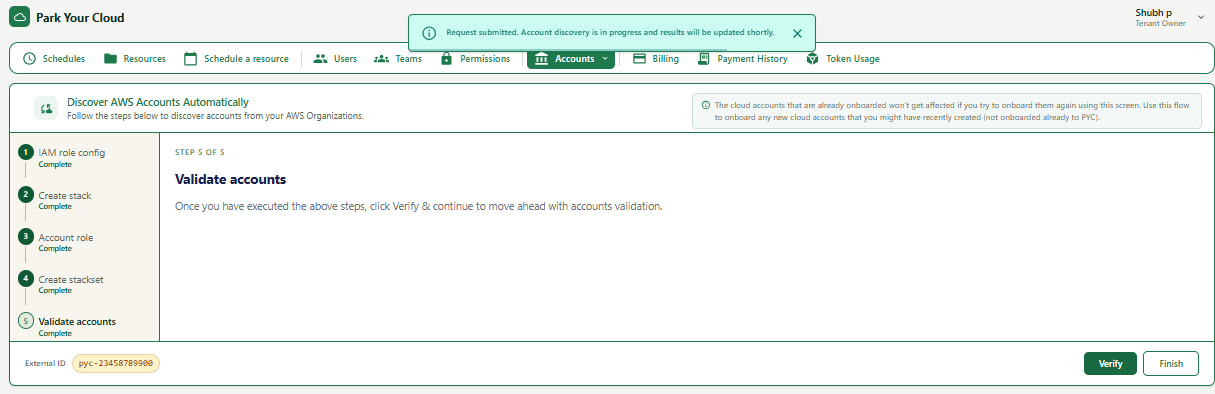
All 5 steps on the left sidebar are marked Complete. This is the final step of the onboarding wizard.
PYC uses the IAM roles you set up to scan your AWS Organization and discover all member accounts. This runs in the background and may take a few moments. Discovered accounts will appear in your Accounts list automatically.
Review Verification Results
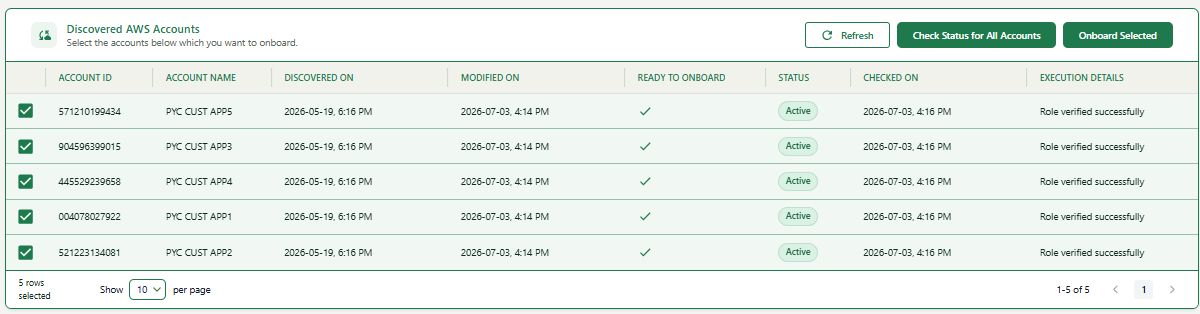
After you click Verify, PYC runs account discovery in the background. This takes approximately 5 minutes. Once complete, the Discovered AWS Accounts table appears, listing every account PYC found using the CloudFormation stack or StackSet you deployed.
| Column | Description |
|---|---|
| Account ID | The unique AWS account ID discovered by PYC. |
| Account Name | The display name of the AWS account. |
| Discovered On | Date and time when PYC first detected this account. |
| Modified On | Date and time of the most recent update to this account record. |
| Ready to Onboard | A green checkmark means the IAM role was verified successfully and the account is ready to onboard. |
| Status | Shows Active when the account is reachable and the role is in place. |
| Checked On | Date and time when PYC last verified the role for this account. |
| Execution Details | Shows "Role verified successfully" when setup is correct, or an error message if there is a problem. |