Azure Onboarding Guide
Step-by-step instructions for connecting your Azure subscriptions to Park Your Cloud using a PYC service principal and Management Groups. Choose your method below.
See what gets parked on Azure →Navigate to Accounts and Start Azure Onboarding
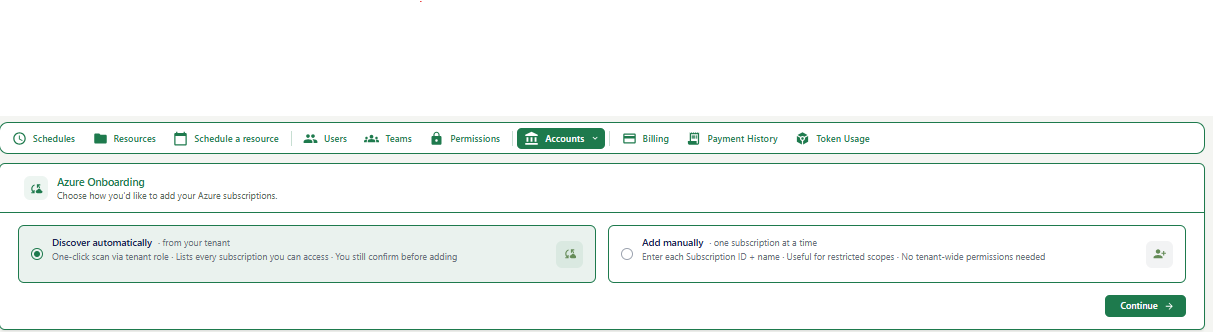
Where you are: The Azure Onboarding screen.
How to get here: Click Accounts in the top navigation bar, then select Azure from the dropdown.
| Option | When to use it |
|---|---|
| Discover automatically | You have an Azure tenant with a Management Group set up. PYC will scan all subscriptions linked to your tenant automatically. Best for most users. |
| Add manually | You want to add one subscription at a time, or you do not have tenant-wide permissions. |
Enter Your Azure Tenant ID (Step 1 of 4)
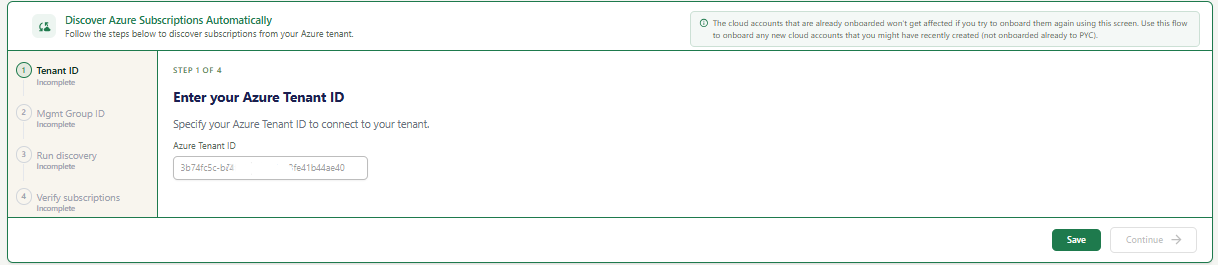
A 4-step wizard on the left sidebar. You are on Step 1: Tenant ID.
If you have already onboarded some Azure subscriptions before, this flow will not affect them. It only adds new subscriptions not yet onboarded to PYC.
| Field | What to enter | Example |
|---|---|---|
| Azure Tenant ID | Your Azure Active Directory Tenant ID. This is a unique identifier (UUID format) for your Azure organization. | xxxxxxxx-xxxx-xxxx-xxxx-xxxxxxxxxxxx |
To find your Tenant ID: Go to Azure Portal > Azure Active Directory > Overview. Your Tenant ID is displayed on that page.
Enter Your Management Group ID (Step 2 of 4)
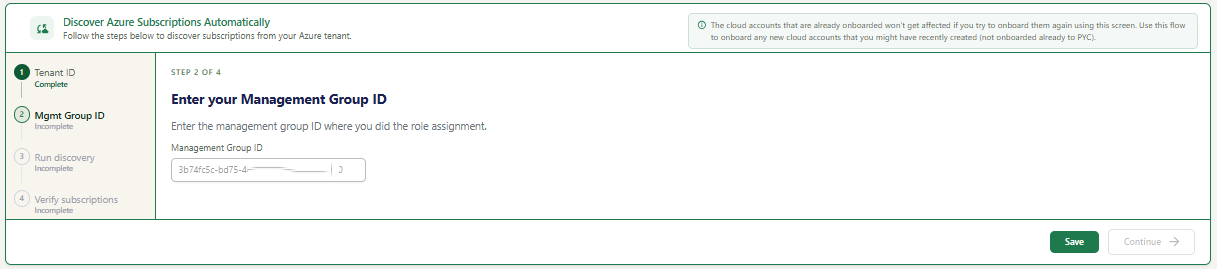
Step 2 of the wizard asking for your Azure Management Group ID.
| Field | What to enter | Example |
|---|---|---|
| Management Group ID | The ID of the Azure Management Group where you performed the role assignment for PYC. This is typically your root Management Group ID. | xxxxxxxx-xxxx-xxxx-xxxx-xxxxxxxxxxxx |
To find your Management Group ID: Go to Azure Portal > Management Groups. Click on your root management group and copy the ID shown.
Run the Discovery Script (Step 3 of 4)
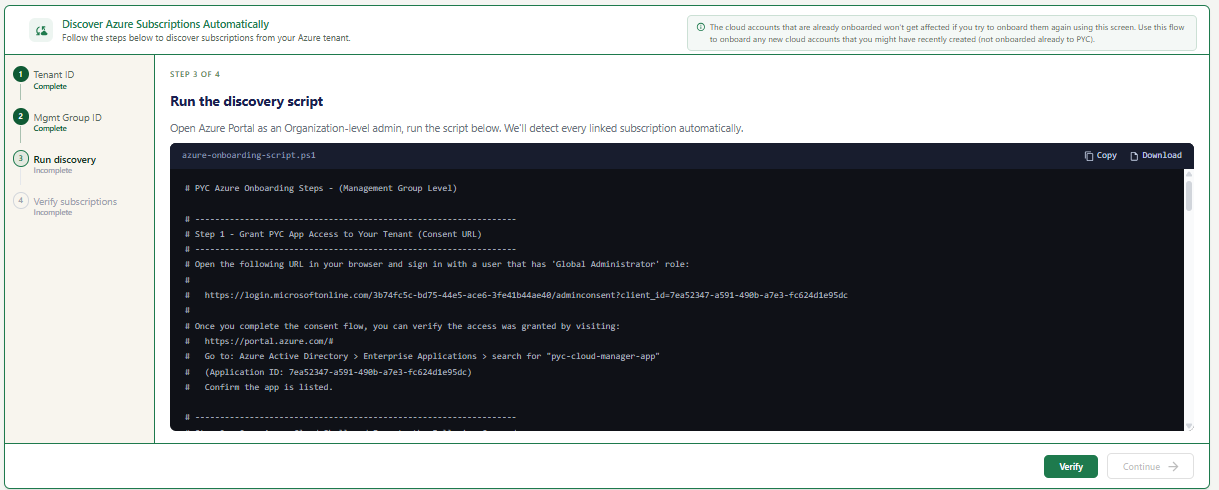
A PowerShell script file (azure-onboarding-script.ps1) is displayed on screen. This script assigns the necessary role to the PYC service principal across all subscriptions in your tenant.
This script grants the PYC service principal (pyc-cloud-manager-app) the Reader role across your Management Group, allowing PYC to discover all linked subscriptions automatically.
You must be an Organization-level admin (Global Administrator or equivalent) in your Azure tenant to run this script successfully.
Verify Subscriptions (Step 4 of 4)
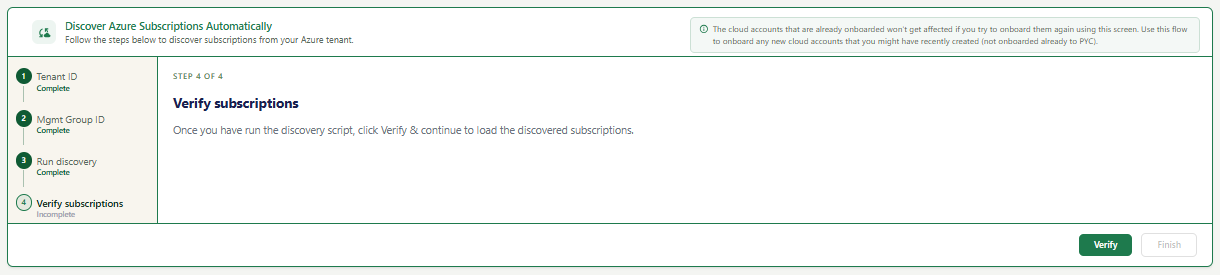
All 4 steps on the left sidebar are marked Complete. This is the final step of the Azure auto-discovery wizard.
PYC will display all Azure subscriptions it discovered under your tenant. They will appear in your Accounts list and are ready for scheduling and resource management.
Review Verification Results

After you click Verify, PYC runs subscription discovery in the background. This takes approximately 5 minutes. Once complete, the Azure Subscriptions table appears, listing every subscription PYC found using the service principal and PowerShell script you configured.
| Column | Description |
|---|---|
| Subscription ID | The unique Azure subscription ID discovered by PYC. |
| Subscription Name | The display name of the Azure subscription. |
| Discovered On | Date and time when PYC first detected this subscription. |
| Modified On | Date and time of the most recent update to this subscription record. |
| Ready to Onboard | A green checkmark means the service principal has the correct permissions. A red X means there is a permission or configuration issue. |
| Status | Shows Active when the subscription is reachable. |
| Checked On | Date and time when PYC last verified the service principal for this subscription. |
| Execution Details | Shows "Role verified successfully" on success, or the specific service principal error message if permissions are missing. |
If a subscription shows a red X under Ready to Onboard, the service principal does not have the required permissions on that subscription. Re-run the Azure PowerShell script for that subscription, then click Check Status for All Subscriptions to re-verify.