GCP Onboarding Guide
Step-by-step instructions for connecting your Google Cloud projects to Park Your Cloud using a custom IAM role and service account. Choose your method below.
Navigate to Accounts and Start GCP Onboarding

Where you are: The GCP Onboarding screen.
How to get here: Click Accounts in the top navigation bar, then select GCP from the dropdown.
| Option | When to use it |
|---|---|
| Discover automatically | You have a GCP Organization set up. PYC will scan all projects under it automatically via a service account. Best for most users managing multiple projects. |
| Add manually | You want to add one project at a time, or you do not have organization-wide permissions. |
Configure IAM Role (Step 1 of 3)
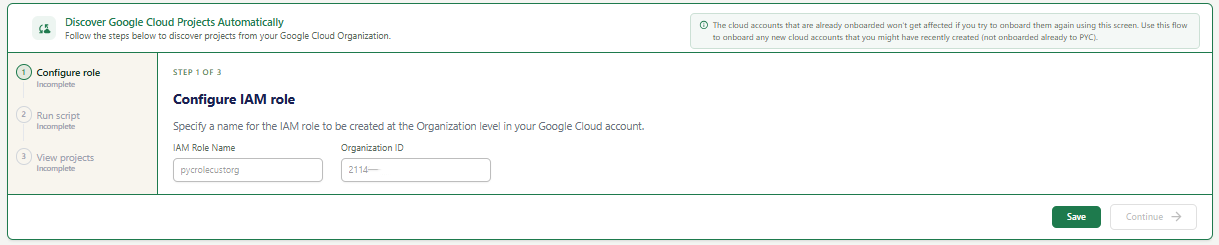
A 3-step wizard on the left sidebar. You are on Step 1: Configure role.
If you have already onboarded some GCP projects before, this flow will not affect them. It only adds new projects not yet onboarded to PYC.
| Field | What to enter | Example |
|---|---|---|
| IAM Role Name | The name for the custom IAM role PYC will create at your GCP Organization level. You can keep the default or use a custom name. | pycrolecustorg |
| Organization ID | Your GCP Organization ID. This is a numeric value found in the GCP Console under IAM & Admin > Settings. | 000000000000 |
To find your Organization ID: Go to GCP Console > IAM & Admin > Settings. Your Organization ID is displayed at the top of the page.
Run the Discovery Script (Step 2 of 3)
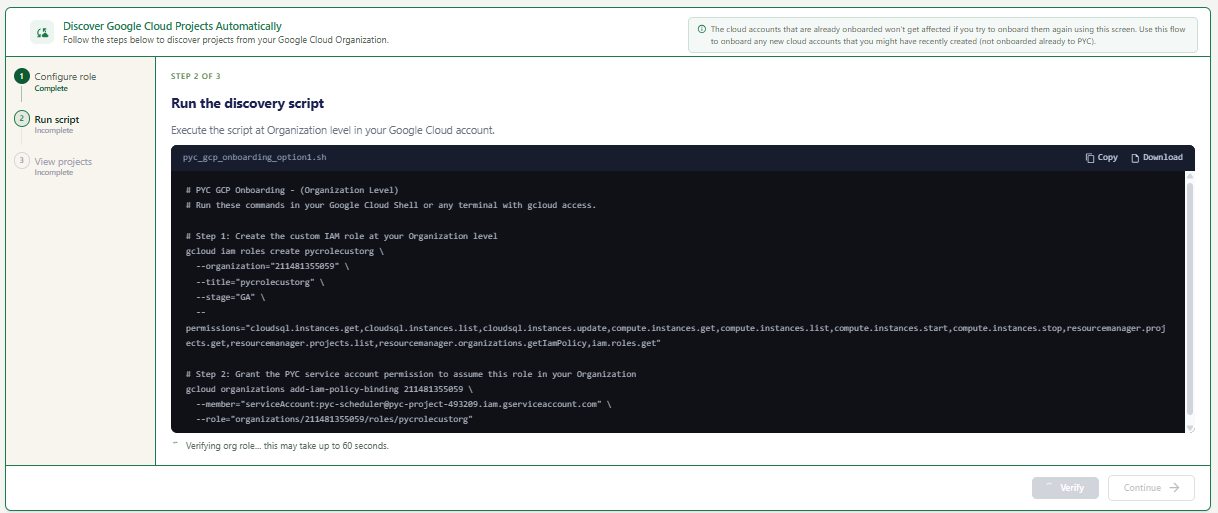
A shell script file (pyc_gcp_onboarding_option1.sh). This script creates a custom IAM role at your GCP Organization level and grants the PYC service account permission to assume it, enabling PYC to discover all projects under your organization.
The custom IAM role grants PYC the minimum permissions required to list projects, manage Cloud SQL instances, and start/stop Compute Engine instances across your entire GCP Organization.
You must have Organization Administrator or Owner permissions in GCP to run this script successfully.
View Discovered Projects (Step 3 of 3)

All 3 steps on the left sidebar are marked Complete. This is the final step of the GCP auto-discovery wizard.
PYC will display all Google Cloud projects found in your Organization. They will appear in your Accounts list and are ready for scheduling and resource management.