← Documentation
Step 7 of 7Tenant Owner or User
Map Schedule to a Resource
Creating a schedule in Step 6 does not automatically apply it to any resource. You must go to Schedule a Resource and link the schedule to the specific resource you want to start and stop.
1
Navigate to Schedule a Resource
Click on Schedule a resource in the top navigation bar.
2
Select the resource to schedule
Expand
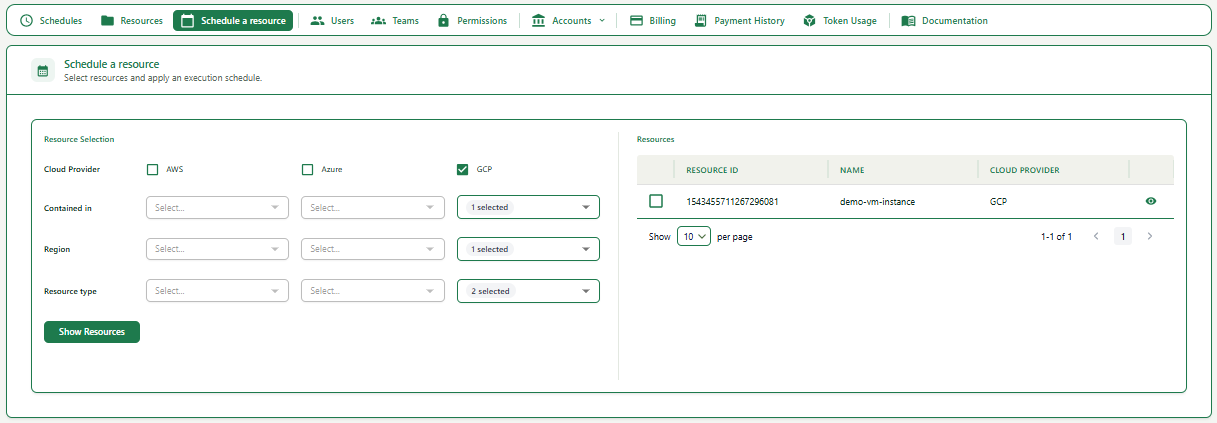
1In the Resource Selection panel on the left, select the Cloud Provider (AWS, Azure, or GCP) by checking the checkbox.
2Select filters for Contained in (account/project), Region, and Resource type.
3Click Show Resources. The matching resources, based on the permissions allocated to the user's teams, will appear on the right side.
4Select the resource you want to schedule by checking the checkbox next to it. You can also check resource details by clicking the eye icon on the right side of the resource.
3
Configure and apply the recurring schedule
Expand
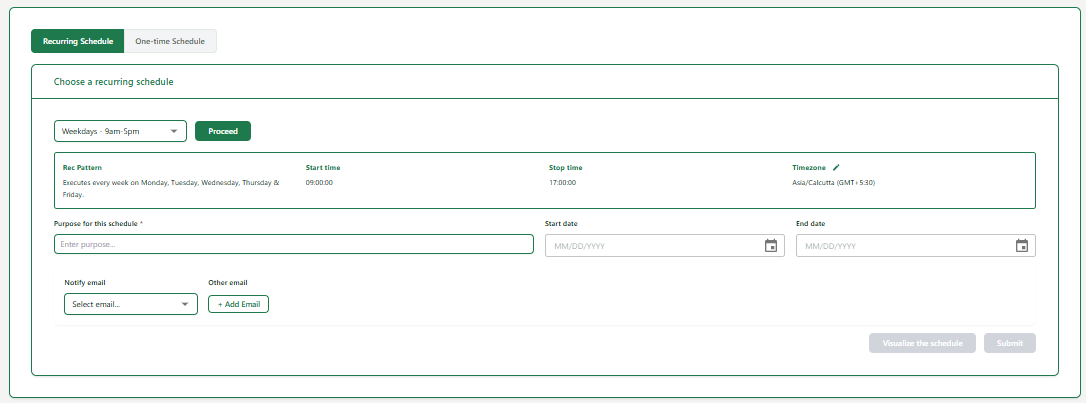
1Make sure the Recurring Schedule tab is selected.
2Select your schedule from the dropdown.
3Click Proceed to confirm the schedule selection. The pattern details will appear below showing Recurring Pattern, Start time, Stop time, and Timezone.
| Field | What to enter | Example |
|---|---|---|
| Purpose for this schedule | A short description of why this schedule is being applied to this resource. | Dev server weekday schedule |
| Start date | The date from which this schedule should start running. | 06/30/2026 |
| End date | The date on which this schedule should stop running. | 12/31/2026 |
| Notify email / Other email | Email address(es) to notify when the schedule runs. Select from team emails or add a custom one. | john.doe@example.com |
1Fill in the Purpose, Start date, End date, and Notify email fields.
2Click Visualise the schedule to preview when it will run.
3Click Submit to apply the schedule to the selected resources.